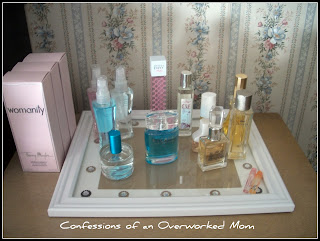
I've been searching for some type of tray I could use to hold my perfumes sort of as a visual reminder for me of where they *should* be placed when I'm done with them. I found a number of really beautiful trays but none were quite what I was looking for. Being the crafty girl that I am, I decided that I would try to make my own perfume tray.
Armed with my 20% off Michael's coupon, I headed out to shop for supplies. I didn't want to spend a lot on this project and debated a number of different techniques to get the look I wanted. In the past I ran a successful craft site where I sold a number of my creations so I know how to do a ton of different types of crafts. I was hoping to find a wooden tray to decoupage but Michael's had nothing but cheap fake wood type trays that I wasn't interested in. I looked for something metal or a mirror thinking I could decoupage on that just as easily but no luck there either.
In the end, I settled for a pretty white picture frame with a glass front that was on sale for 40% off. I grabbed some pretty scrapbook paper for a back that I probably didn't need considering the 5" thick stack of paper on my craft table. The next step took me a while. I wanted some type of decoration on the tray without making it busy and detracting from the beauty of the perfume bottles themselves. I wanted a sort of antique or vintage type of look that wasn't too busy or ornate. In the end I settled on a some chipboard metallic look stickers.
All in all, I'm really pleased with how it came out. It's simple and fits with our bedroom decor. It was a frugal solution since all the materials ended up costing me only $5.39 after the coupon I used at Michael's.
Here's what I did.
The supplies
Place stickers around the border.
Put it back together with pretty backing.
The finished project
In place with perfumes
What do you think?
This is not a sponsored post in any way. I received nothing in exchange for posting. I'm just in a crafty mood.


Tidak ada komentar:
Posting Komentar